Photo Courtesy of Dan Tabár Photography
“Bright reds – scarlet, pillar-box red, crimson or cherry – are very cheerful and youthful. There is certainly a red for everyone.”
– Christian Dior
Well, it’s that time of year again: Valentine’s Day! Whether you’re doing a red lip for yourself, or your honey, I’ll be showing you a few of my absolute favorite red lip looks. Even more importantly, I’ll show you how to do the perfect red lip.
Let’s begin!
Step 1:
Start by putting a moisturizing balm on your lips. I use Vaseline.
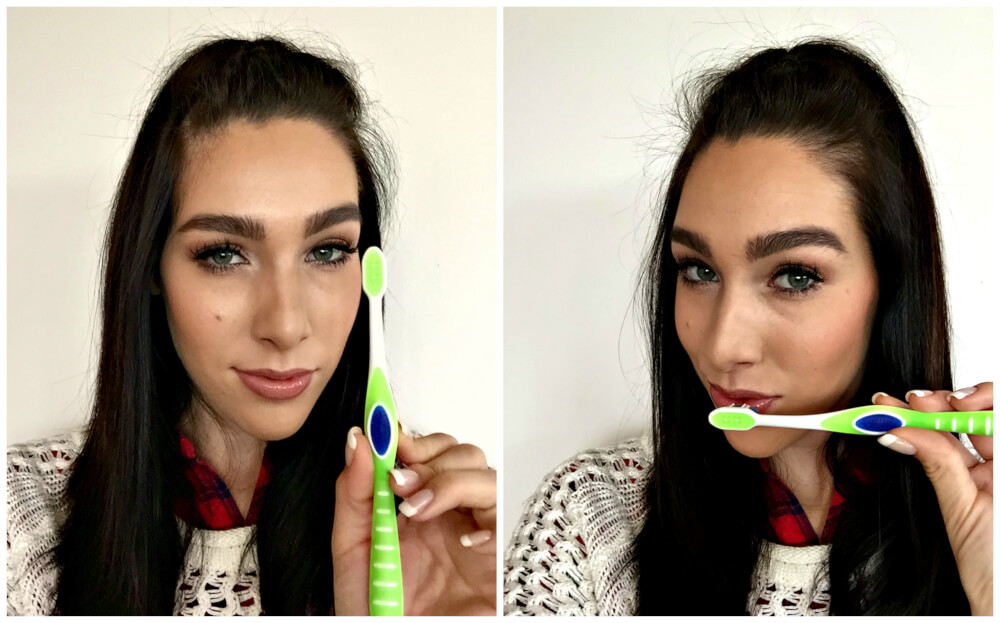
Step 2:
Use a brand new toothbrush to gently exfoliate any dry skin off your lips using small, circular motions.
Step 3:
Rub in the extra balm leftover after exfoliating. We don’t want dry lips under our red lipstick!
Step 4:
Wipe off any excess balm.
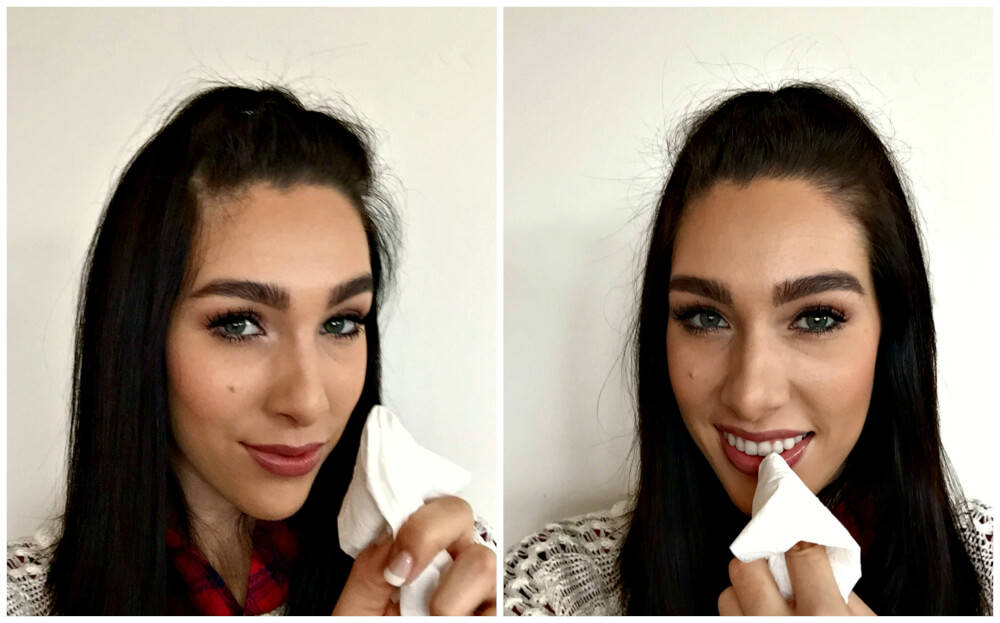
Step 5:
Cover your lips with a thin veil of concealer. I love Maybelline Fit Me Concealer in #10 (usually around $7). It can be found at any drugstore and it’s a perfect dupe for NARS Radiant Creamy Concealer ($29). Not only will this make the outer line of your lips look bright and defined once we apply the red lipstick, it will also help the lipstick last long into the evening!
Here are the three colors I will be using:
1. MAC liner in Burgundy
2. MAC lipstick in Russian Red
3. MAC lipstick in Runaway Red
I personally like to do an ombré lip, which is what I’ll show you in this post. This look makes your lips look plump and modern – which is why I love it!
You can use colors that are more similar in color to create a traditional red lip (in which case you’ll only need one lipstick and a matching liner), or recreate an ombré look with any three colors like I have – these are just my favorites.
Step 6:
Start by putting your brightest color (Russian Red) in the center of your lips only. Then, using your medium shade (Runaway Red), fill in the remainder of your lips, softly blending it with the first color, but not covering it completely. It’s okay if it’s a little messy.
Step 7:
Now comes the hardest part: The liner. But don’t worry! Because we’ve applied the lipstick first, we have a much easier guide to follow with the liner. Take a deep breath and trust yourself – we can always clean this up later.
Step 8:
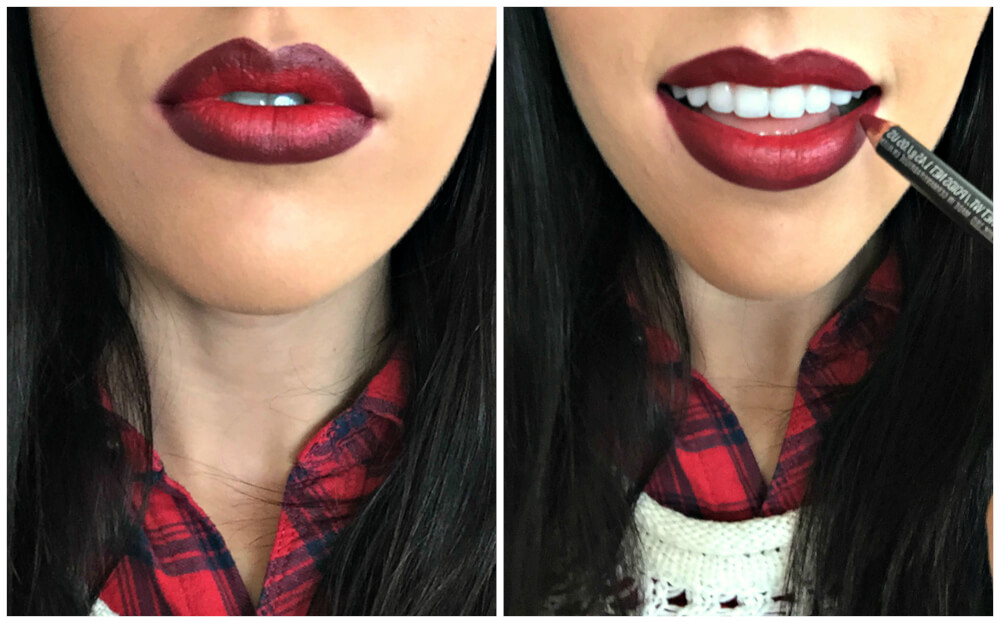
Line your lips, beginning with your cupid’s bow (the v on your top lip) and work your way out to the corners of your smile with small strokes. Then, begin in the middle of your bottom lip and again, work your way out to the corners of your smile on both sides. I make this line very dark, because I like the ombré look. Once it’s blended out, it won’t look so harsh.
If you’re going for the ombré lip, make sure you blend the line a bit into your lips and in the corners of your mouth (as I have in the picture on the right). This line should gradually fade in.
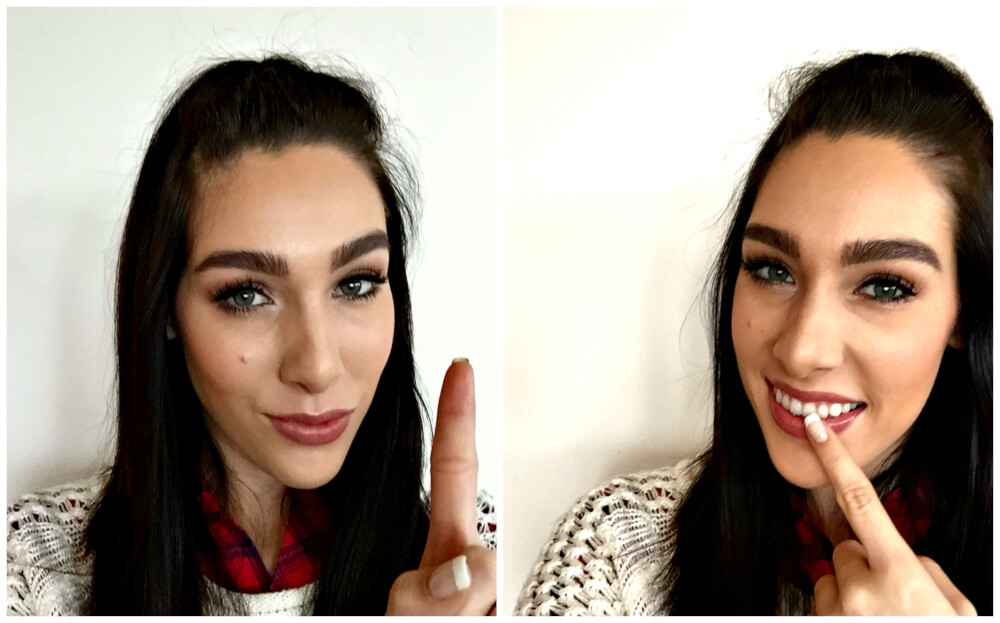
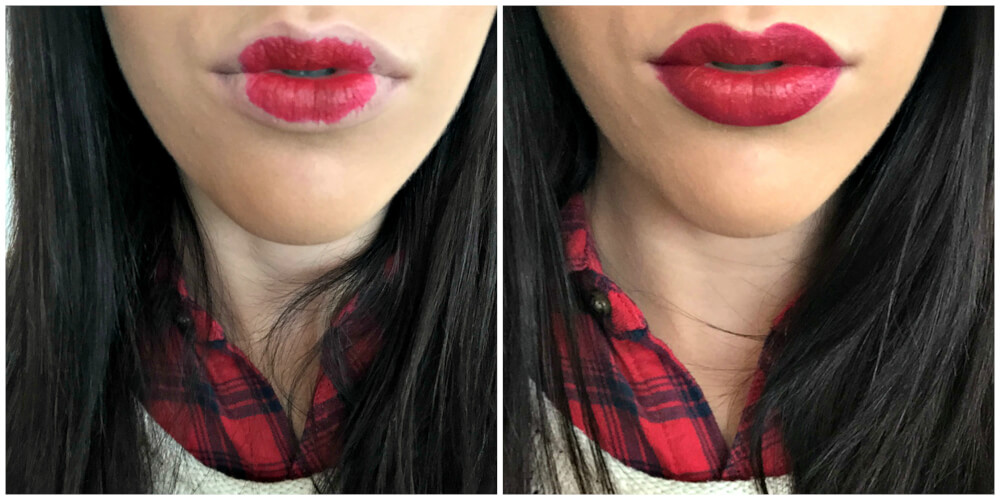
Step 9:
Now, we clean it up!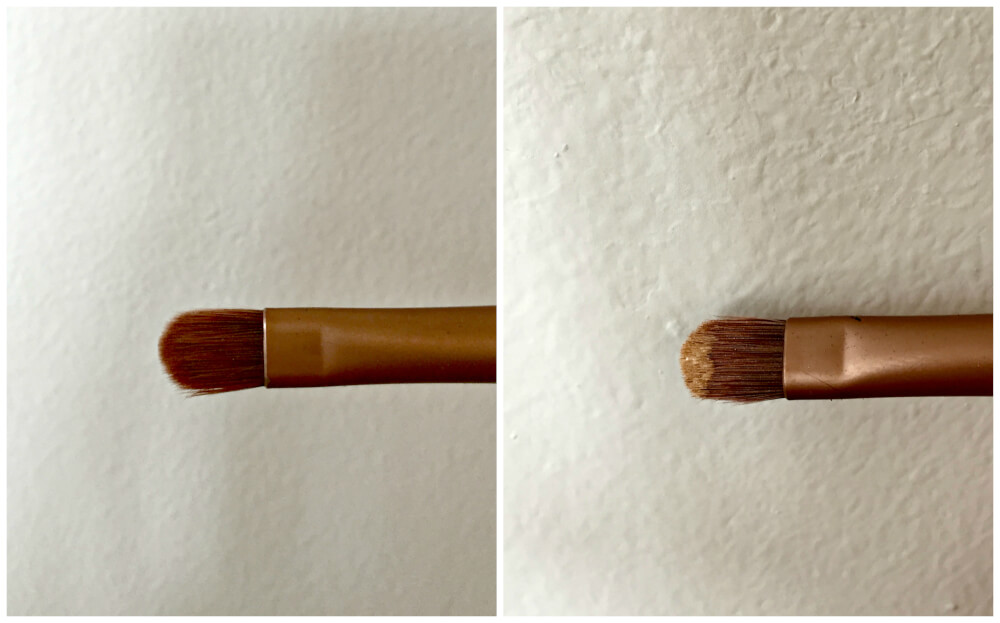
Using a flat brush (like this one), I put a little concealer on the tip and clean up the outline of my lips! This is how you get that photoshop-perfect-pout.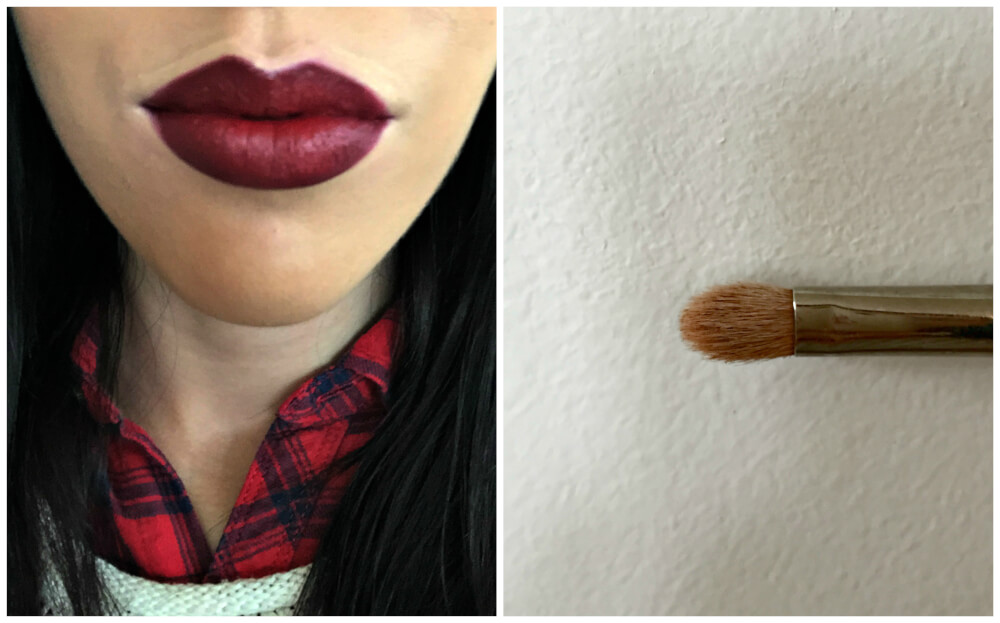
This is what it looks like after I’ve gone around the edge of my lips with concealer. Crazy right?! Next I use a blending brush (this is the exact one) to soften the concealer. Once it’s blended into your foundation no one should have any idea it was there at all.
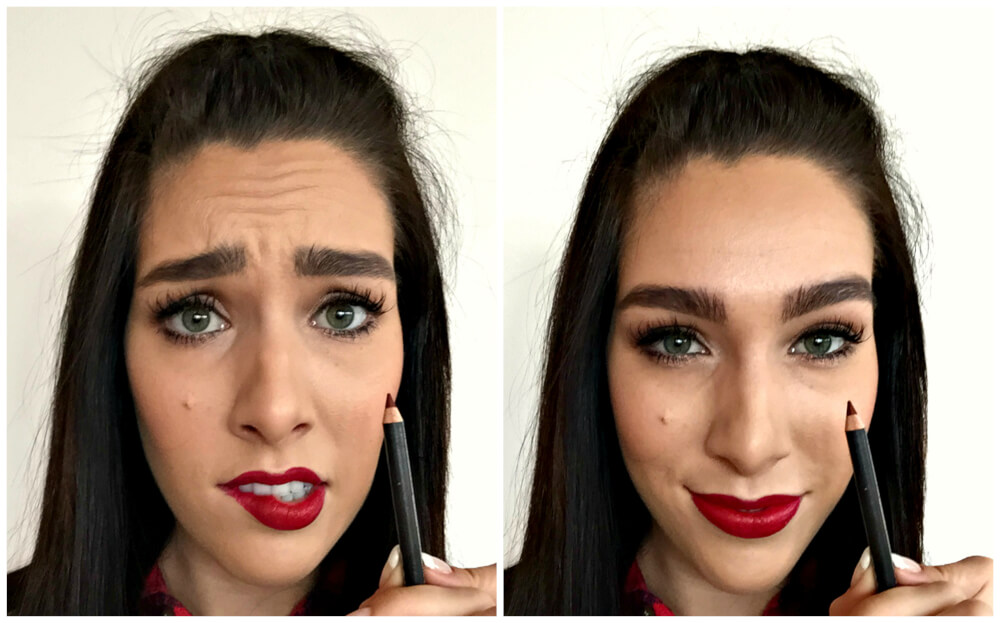
Step 10! All done!

And here’s the finished look! I’ve worn this lip for all sorts of things: Holidays, fashion shows, school, and photoshoots. It’s a classic, gorgeous look that can take you from day-to-night.
Choosing a Red:
As I mentioned earlier, this combination is my favorite red lip look. With that said, here are a few of my other favorites, depending on the red that you’re in the mood for!
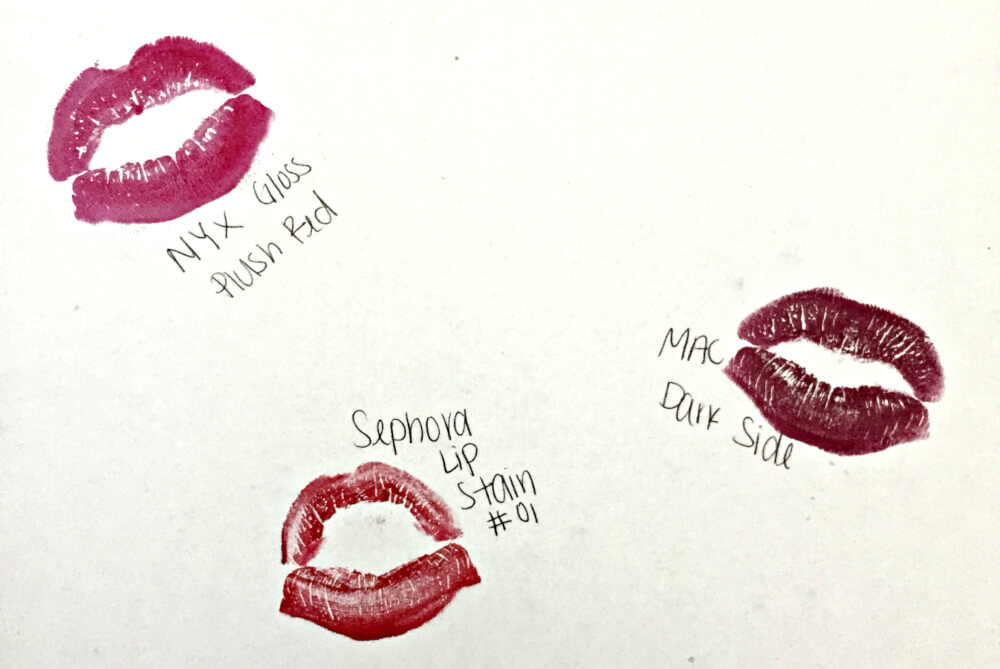
1. NYX Mega Shine Lip Gloss in Plush Red
This is one of my favorite lip gloss lines of all time. This color is a little bit of a deeper red, with gorgeous blue undertones. It’s a quick, commitment-free option because it’s a gloss instead of a stain. I love to layer this over any red lip look for a shiny finish.
2. Sephora lip stain in #01 Always Red
I can’t wear this color without being stopped multiple times by women asking what color it is. It’s a fan favorite, and I personally love it. If you want a matte, vibrant, true blue red, this is your color.
3. MAC liner in Currant with MAC lipstick in Dark Side
And finally, if red isn’t your color, then this is the perfect combination for you. These are my diehard, absolute favorite lip colors in the entire world. These two will give you a gorgeous berry lip that everyone will love.
I know I’ll be wearing this look on Valentine’s Day, will you?! Give this look a try and be sure to post pictures with the hashtag #CoutureLip!