Hello my fellow beauty lovers! The holiday and event season is pretty much here, and I don’t know about you, but my hair is the one thing I never really know what to do with. With Phoenix Fashion Week around the corner (okay, tomorrow) and tons of holiday parties coming up, I have the perfect tutorial for you!
You know those girls whose hair is always perfect? The ones who get blowouts at beauty bars and aren’t afraid to pay a generous amount just so they can’t wash their hair for six days because otherwise it wasn’t worth it? Yeah, I can’t do that. I neeeeeed to wash my hair. Luckily enough, while I was a hair model for a local blow dry bar, an Oribe (This is arguably one of the best hair product brands in the entire world. If I could, I’d bathe in it, it smells that good. Luckily they’ve come out with a perfume with the same scent.) representative styled my hair. His entire seminar was about faking a blow out using just a curling iron – and it’s amazing.
This guy styles J.Lo and Madonna’s hair. He knows what he’s doing. And now you will too, because below I’m sharing exactly how he did it…
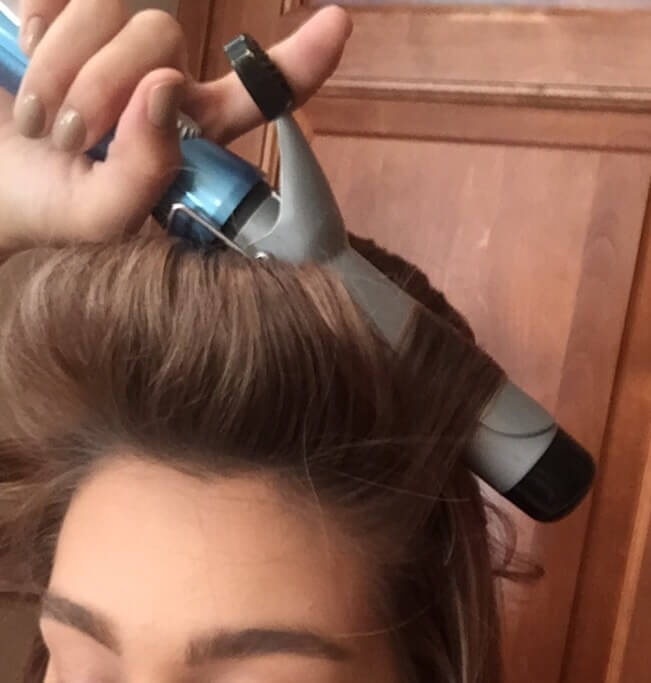
I like to use a 1½ or 2 inch curling iron for this look, depending on how curly you want your hair. Either iron will give you gorgeous volume, but the smaller the iron, the more noticeable the curl. I recommend the 1½ inch iron for those with shorter hair or those who want to actually see curls. I recommend the 2 inch iron for those with longer hair because you’ll still see some curl, and for those who just want major volume and a little wave. I used a 1½ inch today.
First: Prep your hair with a heat protectant (I love this one) and, if needed, a styling cream. Styling creams are great for those of us whose hair likes to fall halfway through the day. Make sure your hair is completely dry before you start curling.
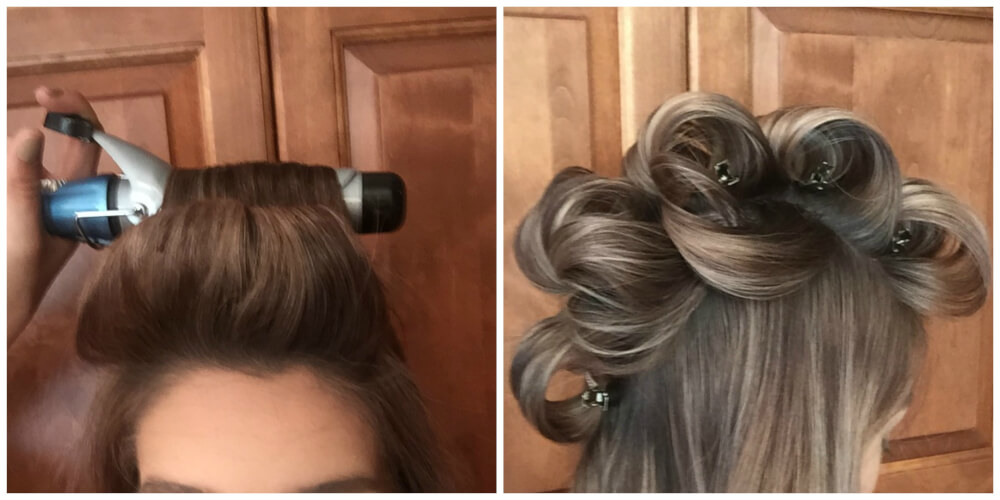
Next: Start by brushing all of your hair back. You’re going to focus on only the middle part of your scalp for now – think about the hair that would be there if you only had a Mohawk. Take your first small section from the very front, and curl it backwards away from your face. The important part about this section of the tutorial is that you want to curl this entire section of your hair backwards and at a horizontal angle. I REPEAT: Curl it with the curling iron horizontal! Otherwise, it’s going to look like normal curls.
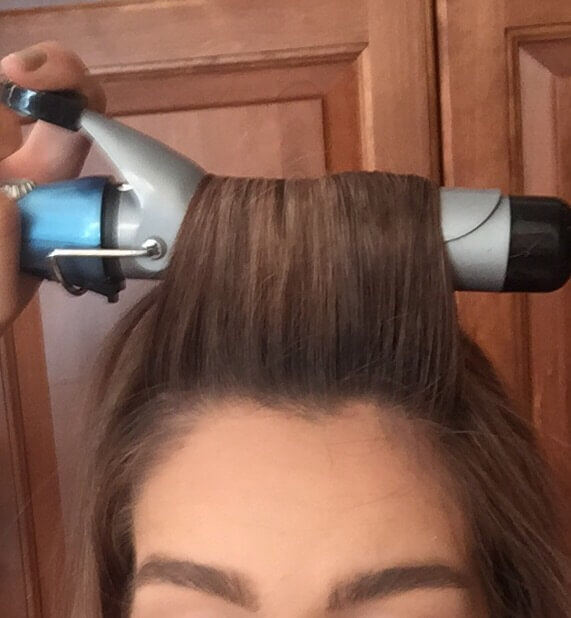
Note: Please, don’t hold the curling iron on your hair for too long. You don’t need to say the alphabet or count to 10 as slow as humanly possible. 5 seconds should give you a great hold and curl. Be kind to your hair.
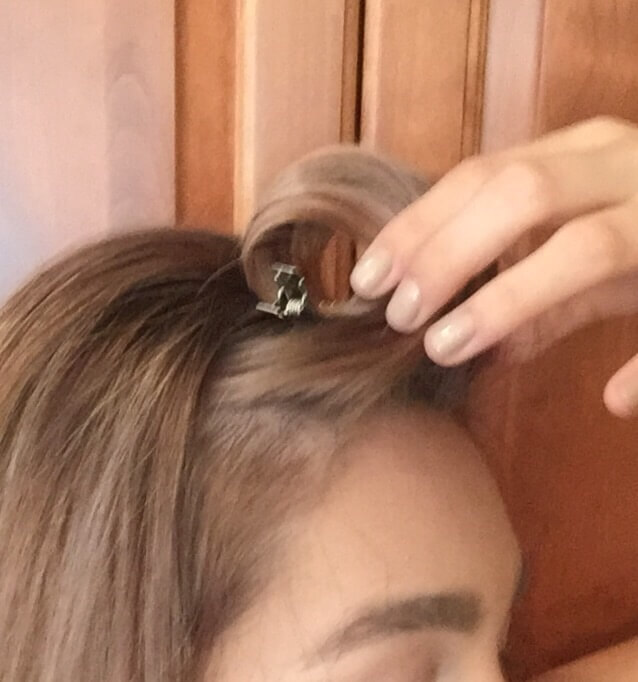
Then: You’re going to pin every curl right off the iron. Don’t let it fall first, the entire point is to let it cool in the same coiled position you curled it in so it sets. I like using metal clips, but you could use bobby pins (they might crease your hair depending on its texture) or Velcro curlers.
Continue: Keep curling each section backwards in the exact same way until you reach the nape of your neck.
Next: Now you’re going to curl the sides. These are going to be curled backward and away from your face at a vertical angle – just like regular curls. Do every section except for the one closest to your hairline/bangs area. These do not have to be pinned.
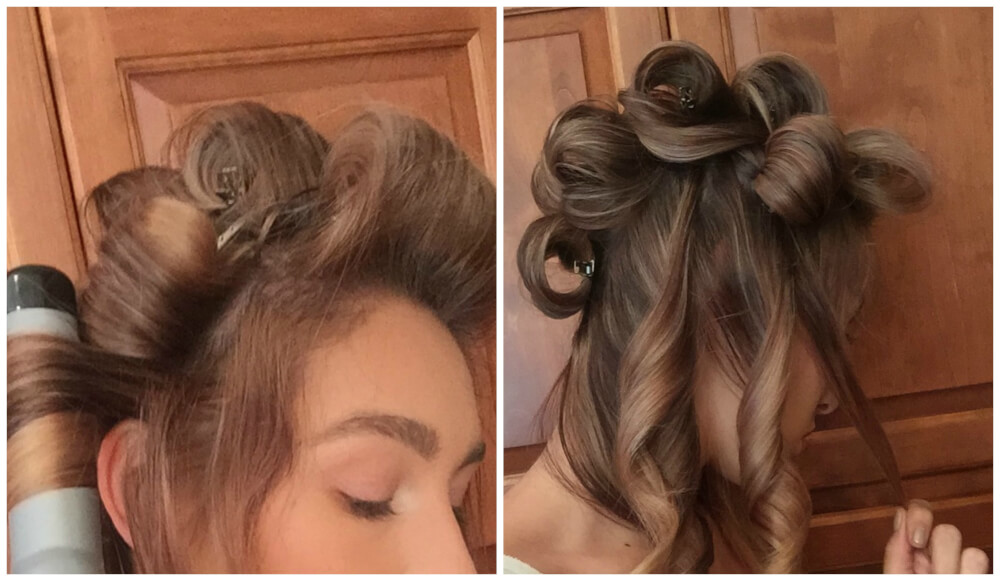
Finally: Curl your bangs/front section of hair back away from your face just as you did the “Mohawk” section. I leave these for last because I like them looser than the rest of my hair, so I don’t want them to set for as long. Pin them.
Now you have time to do you makeup, get dressed, and do whatever else you need to do before you go. Let these set until they’re completely cool for the longest lasting style. Once you’re ready to take it down, remove the pins.
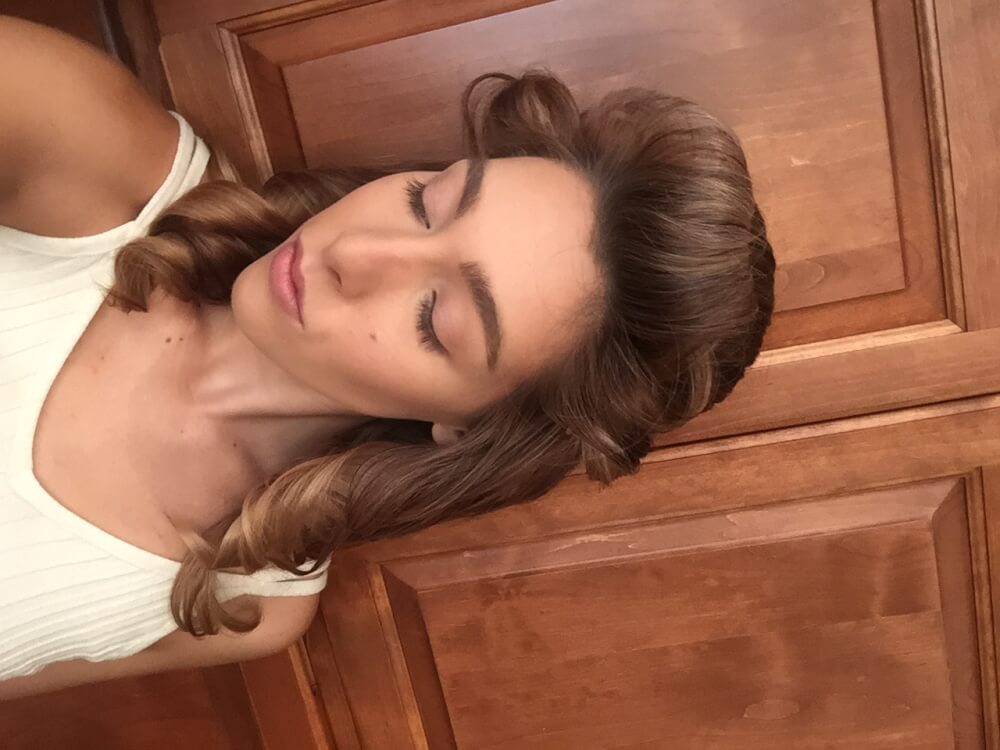
Your hair will probably look a little crazy, but don’t worry. Finger comb through your hair to loosen the curls and create natural texture. Start to manipulate the curls to look however you want them. If it’s still too curly, you can brush through them to tame them even more.

Finish: I like to finish mine off with a little hairspray (keep it soft and light – this is supposed to look effortless and it should last all day without the hairspray) and shine spray.
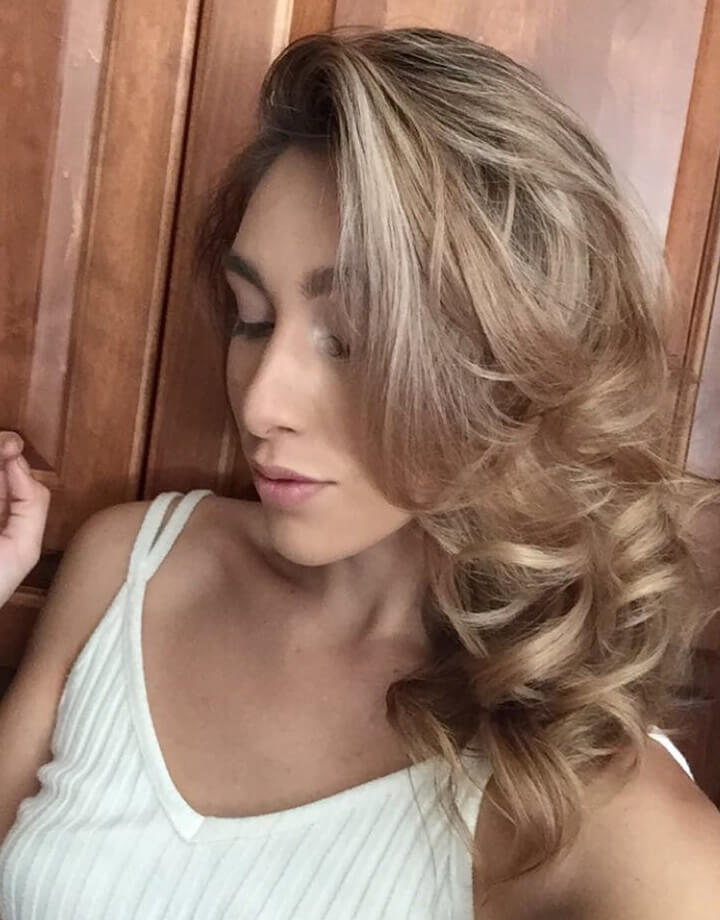
Voila! Now you look like J.Lo. You’re welcome.