Winged eye liner gives me anxiety. If you’ve ever attempted winged liner, you know exactly what I’m talking about. And if you don’t know what I’m talking about even though you’ve applied winged eye liner, then you’re naturally inclined, steady handed, possibly ambidextrous, and I envy you.
Celebrities have rocked this look for years – the most widely known celeb for their wings is probably Lauren Conrad. She’s always donning the most perfectly-matched wings.
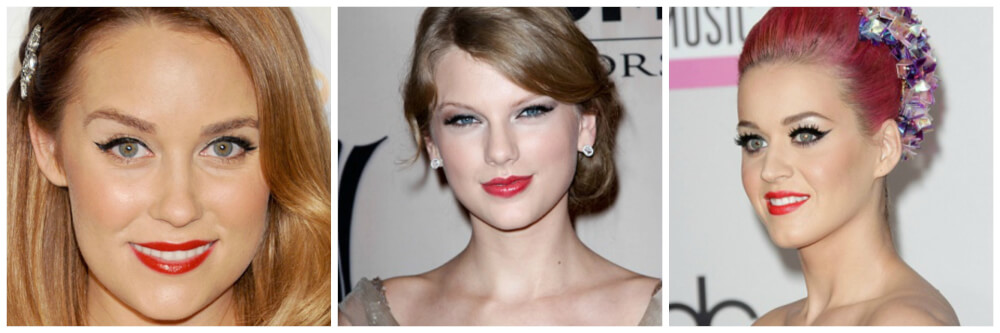
The three celebs most commonly known for wearing winged eye liner: Lauren Conrad, Taylor Swift, and Katy Perry. Picture courtesy of Teen Vogue.
In this tutorial, I’ll show you how I do mine on a daily basis. Don’t be fooled, when I first started, mine were awful. However, after a few times, you truly will get the hang of it and they will start to come together easily.
My first suggestion is to really make sure you pick the right product for you. Here’s a breakdown of your options and what they’re good for.
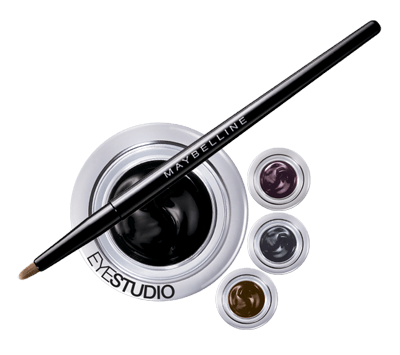
Maybelline Eye Studio Lasting Drama Gel Eye liner in Blackest Black. Courtesy of Maybelline New York.
Gel liner. This is my personal favorite. In general, it’s easy to control, seems to stay put for the most part, and you can choose your desired line thickness pretty easily. You get a deep black line with a classy matte finish. I personally love Maybelline’s Eye Studio Lasting Drama Gel Eye Liner in Blackest Black. It even comes with a brush that I love to use!
Local Arizona makeup artist, Lauren Elizabeth, says that her favorite most affordable product is the Maybelline gel liner, while her most favorite high end product is Bobby Brown’s.
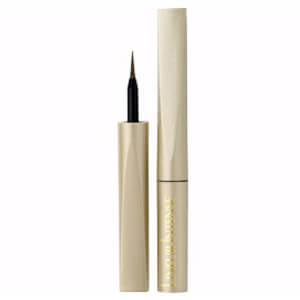
Lineur Intense Felt Tip Liquid Eyeliner. Picture courtesy of L’Oréal Paris.
Liquid liner. Ugh liquid. If you’re ridiculously confident with your eye liner abilities, go for it. As for me, if I use a liquid liner (which I don’t because I try to avoid panic attacks) I use felt tip liners like this L’Oréal one. Liquid will give you an incredibly fine line that can be built to your desired thickness. It’s usually a very dark liner, which is great, and it stays put once it’s dry. That part is important. This means that you better get it right, otherwise you’ll end up redoing part of your eye, and probably some of your blush too because it always ends up on my cheek… Yeah, I don’t know. Use at your own risk.
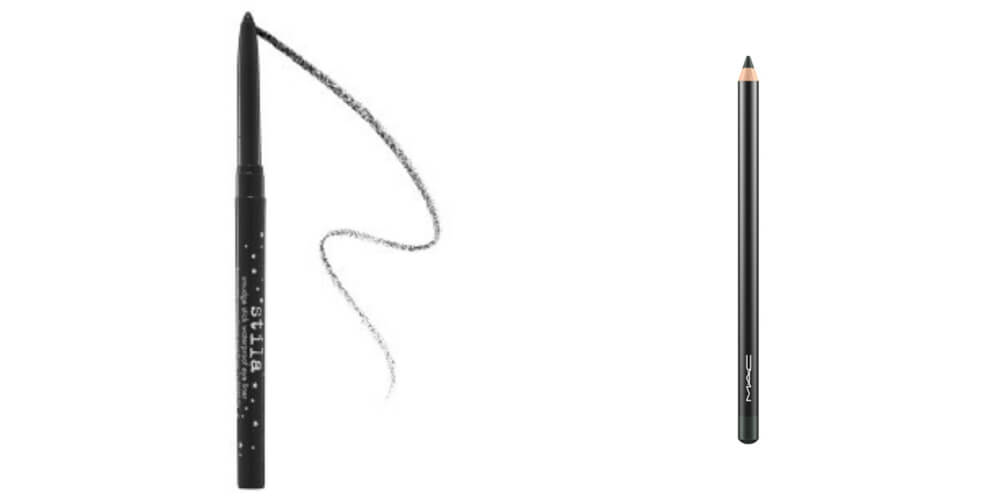
MAC Eye Kohl Eye Liner and Stila Smudge Stick Waterproof Eye Liner. Pictures courtesy of MAC and Sephora.
Pencil Liner. This is a toss up for me. I use pencil liners if I use any color but black. I think this is because I like to smudge out other colors and blend them into my shadow a bit. As for black pencil liner, if you’re going for the rock and roll, smudgy, smoky look, I’d say try pencil. It looks gorgeous when done right. Just be careful, I’ve found that pencil does seem to transfer easier than the others. Try Stila’s liner, I love it. It gives you a deep black line, with the pencil smudging abilities. Win/win. If you want a more rock and roll vibe, try MAC’s Kohl pencil. Love.
Now for the tutorial! For this one, I’m using the Maybelline gel liner, because I find it to be the most difficult to apply (besides liquid liner, which I’m not messing with) but it has the best payoff – in other words, it’s completely worth it.
First, make sure your eye makeup is complete. Typically, liner should be the last step before mascara.
Smudge your eyeliner brush in the product. Really get enough on it, you want the color to be deep. Clean it off on the sides so your brush comes to a fine line. This helps you start with a small line – you can always build it up later!
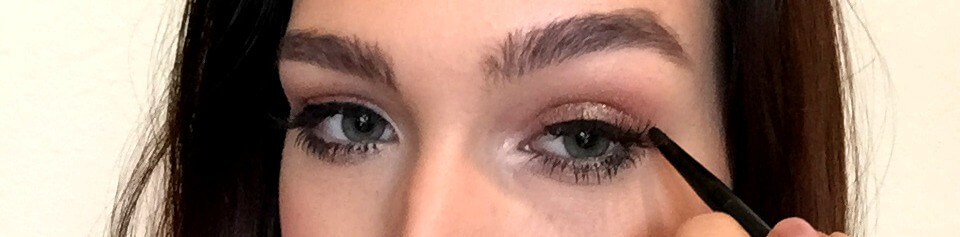
Start with your wing. Trust me, I never used to do this, and when I started it changed everything. Draw a line from the end of your eyelid upwards to your crease, it should have a slight slant.
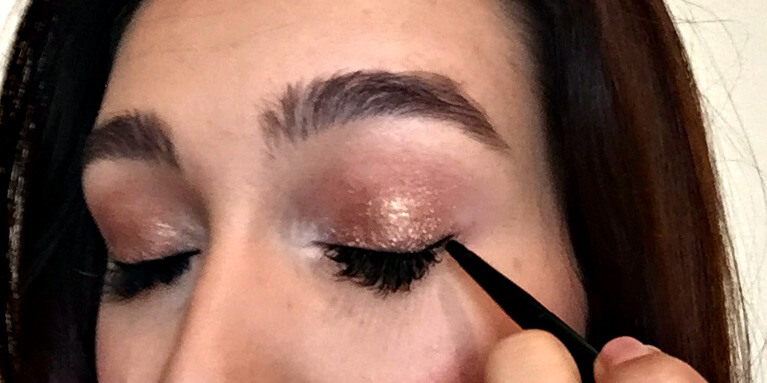
Now, connect that line to your eyelid once more, creating a wing. Start small, you can always add on. And chances are, something will get messed up and you’ll have to add on anyways, so make sure you keep it small for now.
Next, start making little strokes along your lash line, creating the eyeliner line. Keep this thin. Connect that to your wing and make sure you like the shape
Finally, start with a tiny bit more product, and complete your line by lining the inner corner of your eye. At this point, you can make it thicker or leave it as is!
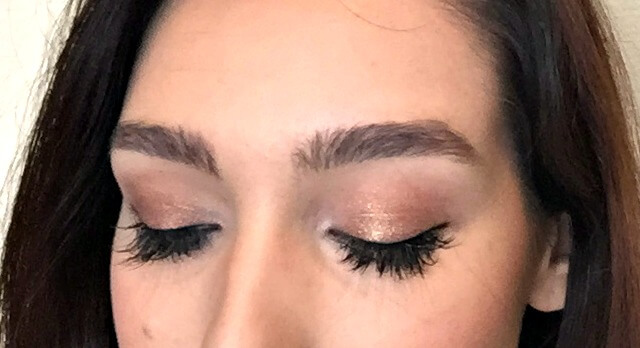
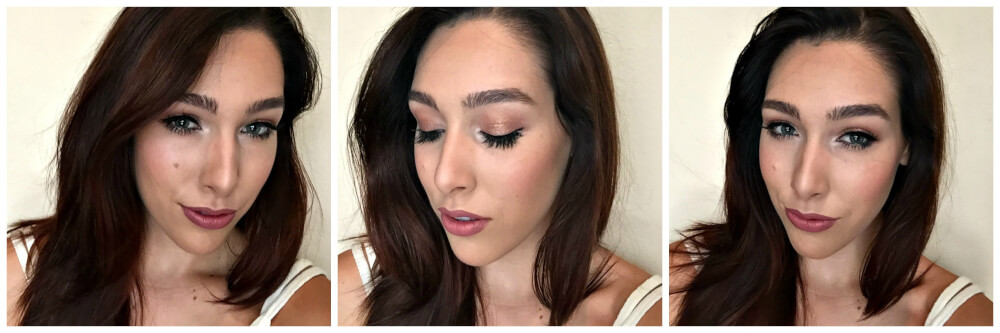
See, that wasn’t so bad! Hopefully this helps make it a little easier. Wings are one of my most favorite beauty go-to’s. They’re always classy and always in. Hopefully now you can rock this look with confidence!