Gel Manicures are one of my favorite things, but the price tag that accompanies them is not. About a year ago I decided to start doing my own, and through the countless hours of practicing and perfecting, I’ve finally got it down to a science!
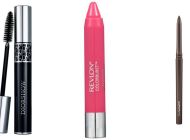
First, you’ll need the proper products. I recommend the Gelish Gel nail line, which you can find at Sally Beauty Supply. (If you have a pro card, get the products at a store for those who have a cosmetology license. It’s much cheaper.) Here are the products you must have in order to successfully do your nails. These are the bare minimum – no skipping any of these!
- Gelish Foundation Base Gel ($22.99)
- Gelish Color Polish ($13.99) {The color in this post is “Make You Blink Pink”}
- Gelish Top It Off Soak Off Sealer Gel ($13.99)
- LED Lamp ($24.99) {These can be expensive. Buy an affordable one – a more expensive lamp doesn’t mean a better manicure. They all do the same thing. If you have a UV lamp, those will work, but make sure you cure your manicure for the proper time – which I’ll list below.}
- Alcohol to dehydrate and cleanse your nails ($7.69) {This is where you can save some money. You don’t have to buy this brand – regular rubbing alcohol will do the same thing.}
If all of this is too complicated, Gelish makes it simple by selling a starter kit. The only thing missing is the lamp!
I realize this quickly adds up and becomes an expensive commitment. Remember that gel manicures last two weeks minimum for most people, they’re a great way to grow out your nails, and when you do them yourself, not only do you save money, but you can also save your nails from harmful damage done at beauty salons. This helped me to make the jump when I first considered the cost versus the benefits. It quickly pays off!

Prep:
It is important to know that once you begin your first hand, you can’t do much until you’re completely finished! The tacky residue on your nails will either transfer to everything you touch or attract everything you touch. Not good. Take care of food, entertainment, drinks, etc. before you begin! Realistically, it takes about an hour to do both hands start-to-finish. If you’re a beginner, plan for a little longer the first few times.
- Start with clean hands and nails, and make sure you have removed any polish with nail polish remover.
- Next you’re going to shape your nails. File them to your desired length and shape.
- Then, lightly buff the shine from your natural nail. This is where things go wrong. You have to make sure you rough up the nail enough for the gel to stick, but you do not want to thin out your natural nail too much. This is the step that people tend to go overboard on, which results in thin, brittle nails. Don’t make that mistake. Lightly buff the nail until all shine is gone (it doesn’t take much) then stop! If you have any slight ridges or bumps in your nail, buff them out so you have a nice surface to work with. The shape of your nail does determine the end result, so be sure you like the way they look before you move on.
- Push back your cuticles if you have the proper tool to do so. You can use a Birchwood stick, but I prefer the tool.
- Cleanse your nails with rubbing alcohol and a cotton pad. It is very important that you no longer touch your nails with your fingers once you’ve completed this step! You cleanse your nails to rid them of any oils – if there is oil remaining on your nails, the gel won’t stick. Keep this in mind! Make sure there isn’t any leftover stray cotton on your nails. We’re ready to start the gel process!
Foundation and Shaping:
This is where you can really shape your nails. If you have flat nail beds, you can build them up so they appear more dimensional. If you have ridges in your nails, you can fill them in.
I paint my pointer, middle, ring and pinky fingers first, cure those, then do my thumb, and cure that last. This is more time consuming, but it makes the entire process easier for some reason. Do what you’re comfortable with, but definitely only do one hand at a time. I recommend starting with painting your right hand first if you’re a righty – get the hard one over with.
- Paint a thin layer of the foundation gel to start, and make sure it covers your entire nail. I also cap off the end of my nail, just to be sure it’s completely covered. Check to be sure none of this gel is touching your skin – if it is, clean it off with your nail! Otherwise, the gel will lift. Before you cure the gel, flip your hand over so your nails face the floor and hold it for about 10 seconds. This will help the gel fill any ridges, or simply just set up, so your nails don’t appear flat. This is what makes your manicure look fab.
- Technically this coat only has to cure for 10 seconds under an LED light (2 minutes for UV lamps), but I’m heavy handed, and light coats turn into thick coats, so I do 30 seconds to be safe. To each their own – but keep it there for at least 1o seconds. This coat is also the coat that may burn a little if you have thin nails – don’t panic. Just remove your hand, let your nails cool, and place your hand back inside the lamp. Do this as many times as you need, but be sure the total amount of time you place your hand inside the lamp is equal to the required curing time!
- I paint 2 to 3 coats of the foundation gel because I like a flawless foundation and strong nails. The more coats, the less likely your nails are to break. These coats should not be thick, just enough to build up a base for your polish. If you notice any imperfections – bumps, unevenness, etc. – you can buff this layer down until they are gone, and apply another layer over. Don’t be afraid to perfect these coats.
- Once you’ve cured the final coat of foundation, you’re ready to move on to color!
Color Gel:
- Paint your nails following the same pattern as the foundation gel: Pointer, middle, ring, then pinky. Flip your nails, cure. That’s it! Make sure you don’t have any color touching your skin.
- Cure! 30 seconds for LED, 2 minutes for UV. (* If you’re using a dark color, these tend to need more curing time. I’ve heard that LED lights cure them in 30 seconds, but I do 1 minute to be sure. For UV lights, definitely bump the time up to 3 minutes.)
- I’m a perfectionist, so until my nails are completely opaque, I keep painting coats. For this color, I did 3 coats. The pictures show the difference between the first, second, and third. This is entirely your preference.
- Once you’ve cured the final coat, it’s time to do the last few steps!
Top it Off:
- This is the exact same process as the other two gel polishes. Paint a very thin layer (and be careful, this gel is much more runny than the other two) and flip your hand over before curing. Make sure this is not on your skin.
- Cure for 30 seconds for LED, and 2 minutes for UV.
- Once cured, you may apply a second coat for a thicker manicure and an even shinier finish. This is your preference.
- You’ll notice the polish is still tacky, this is normal!
Removing the Residue:
- Put some of the rubbing alcohol on a clean cotton pad, and rub this on your nails. This will remove any sticky residue. All done! Time to do the second hand!
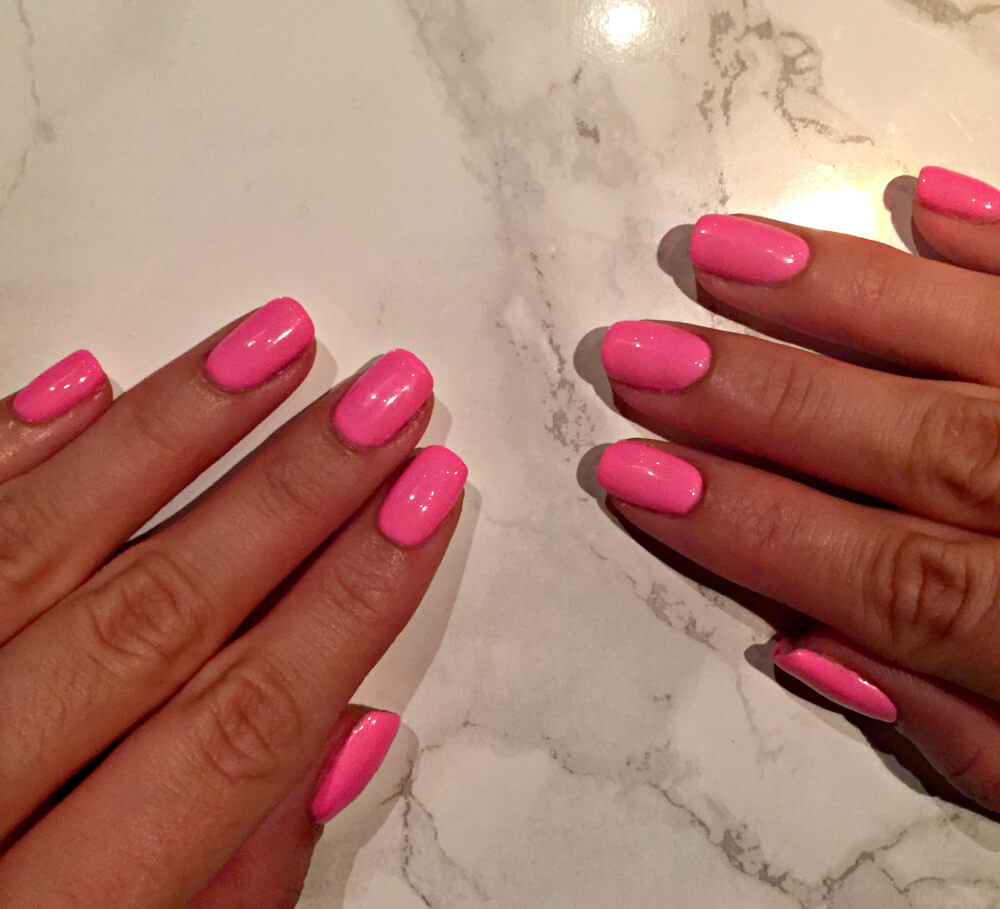
The Finished Look:
Once finished, your nails should look something like this!
Common Mishaps:
Help, my nails are wrinkly: It’s likely that you didn’t cure them for long enough. If you notice your polish rippling, it’s best to start over on that particular nail. I know that’s not what you wanted to hear – and I’m sorry. I’ve had to do this about 800 times, I feel your heartbreak. Buff it down until you’re at or close to your natural nail, and start from the top: foundation gel.
Help, I finished all the steps and my nails are cloudy – not shiny: Very lightly buff the top layer of your foundation gel so the shine is gone, and reapply the Top it Off gel. This should fix it!
Help, the color isn’t opaque and I’ve done five coats: Hey, as long as you don’t mind how thick they are, keep painting. As long as they’re cured properly, you shouldn’t have an issue. It is possible, however, that the thicker they are the more easily they may peel in a week or two. If you want to avoid this but you’re working with a sheer color that requires more coats, just paint very thin coats and be patient.
Help, my nails are flat: Someone didn’t read my gravity trick! :) Make sure you flip your hand upside-down to allow the gel to set up. This will get rid of flat nails.
Help, my nail polish is lifting: This is likely because you either, 1. got gel on your skin, or 2. the polish is too thick making it easier to lift. Your solutions: Check very carefully that you don’t get any gel on your skin during your manicures, and make sure you’re painting very light coats during each step.
This should cover it! I can’t wait to see all of your manicures – happy painting!